Home Home
  • en
    • English
    • German
  • Solutions
    • Document creation
    • Various formats
    • API & integration
    • Teamcenter PLM
  • Products
    RapidAuthor
    • RapidManual
    • RapidCatalog
    • RapidLearning
    • RapidIllustrator
    RapidAuthor for Teamcenter
    • RapidManual for Teamcenter
    • RapidCatalog for Teamcenter
    • RapidLearning for Teamcenter
    • RapidDataConverter for Teamcenter
    • RapidAuthor Connector for Teamcenter
    Viewers
    • Cortona3D Solo
    • RapidAuthor Viewer
    • Cortona3D Viewers for Windows
    • Cortona3D Viewer for iOS
    Cortona3D APIs
    • Cortona3D Integration API
    • Cortona3D Solo API
    RapidDeveloper
    Cortona2D Editor Pro
  • Customers
    • Customers & industries
    • Case studies
    • Testimonials
  • Partners
    • Technology partners
    • Resellers
    • Become a partner
  • Try & Buy
    • Trial
    • How to order
    • Licensing
    • Request demo
  • Resources
    • Demo
    • Release notes
    • Knowledge base
    • Support
    • Tutorials
    • Downloads
  • Company
    • Newsroom
    • Events
    • About us
    • Contacts
  • en
    • English
    • German
Get free trial
Get free trial
Home
Knowledge base
RapidManual/RapidLearning: add Screw Motion

RapidManual / RapidLearning: add Screw Motion

Please also refer to Cortona3D Documentation

Start > All Programs > RapidAuthor > RapidAuthor Documentation: RapidManual(RapidLearning).pdf

Screw motion (definition)
  • A screw motion simultaneously translates and rotates the selected item by the specified number of turns. To specify the translation vector, translate the item using the manipulator from its initial position to the desired position and in the desired direction. The translation vector is used as the rotation axis during the rotation.
To screw an item:
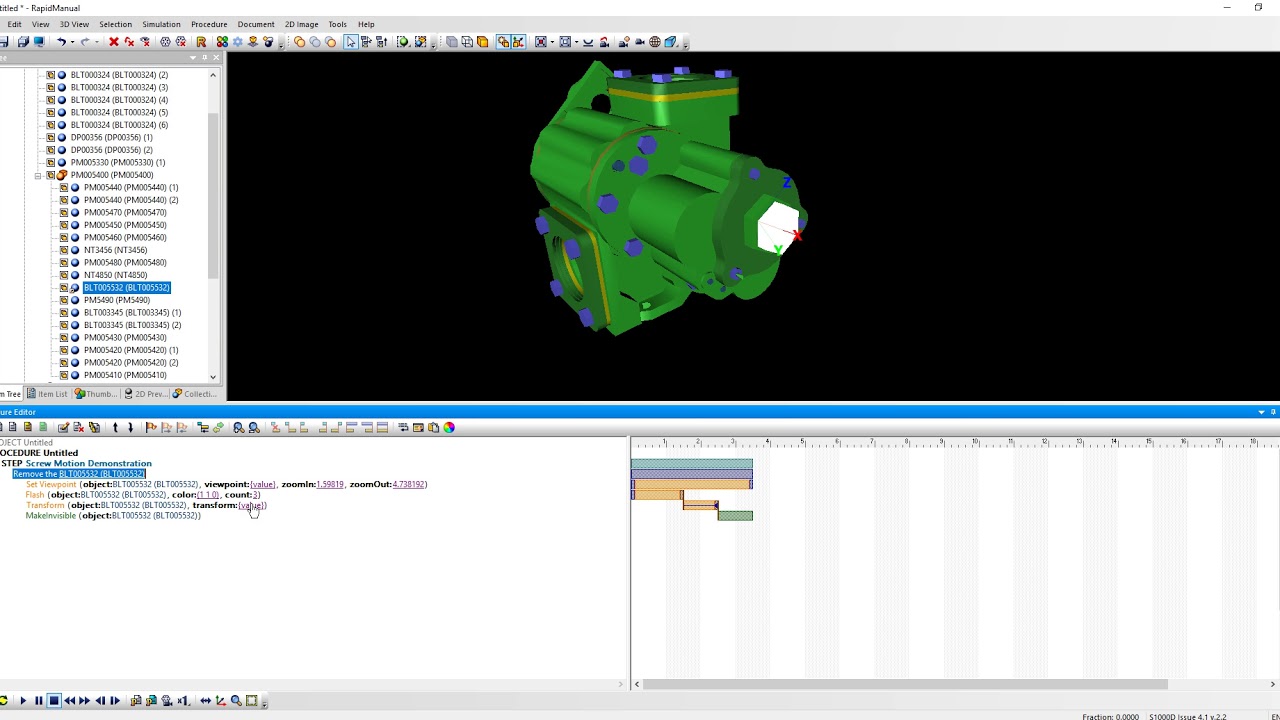
  • Select a part or assembly (collection) in 3D windows or in Item Tree (Scene Tree in older versions of RapidManual)
  • In the Procedure Editor add a new action (e.g. Remove)
  • Expand the action and click on the value under the Transform command
  • Select the Screw check box and specify the number of turns
  • If necessary, change the initial position of the manipulator in the 3D View window. To do this, translate the manipulator holding the CTRL-key. The center of the manipulator is considered to be the starting point of the translation vector (rotation axis)
  • To define the end point of the translation vector, translate the item. To do this, drag one of the controls of the manipulator
  • Click Apply

The rotation axis by default is Y-axis.

Please refer to the video provided, demonstrating Screw Motion creation:

Creating screw motion with RapidAuthor
Creating screw motion


footer-logo
Products
  • RapidAuthor
  • RapidAuthor for Teamcenter
  • RapidDeveloper
  • Cortona2D Editor Pro
  • Viewers
  • Cortona3D APIs
Try & Buy
  • Free trial
  • How to order
  • Licensing
  • Request demo
Resources
  • Demo
  • Knowledge base
  • Tutorials
  • Release notes
  • Support
Company
  • Newsroom
  • Events
  • Contacts
Subscribe
  • © 2025 Cortona3D
  • Legal Notice
  • Privacy Notice
  • twitter logo